Dolphin S200 Pool Cleaning Robot Drive Motor Repair
I've spent the past two weeks doing battle with my pool cleaning robot and want to share what I've learned so others can fix their own if they run into the same problem.

My robot is a Maytronics Dolphin S200. The internals are probably very similar or identical to other models, and I think there are even rebranded versions, so the details below likely apply to a fair amount of the population. These robots are pretty expensive to buy, but they are, in my opinion, the best way to clean my pool. My pool is surrounded by pine trees and they are always dropping stuff in the water, so I keep my robot in the pool and it runs daily on its timer with little intervention from me and uses much, much less electricity than my previous pressure-side pool cleaner.
Rant on Robot Manufacturer Greed
There is a lot of markup on these robots. The S200 I got for $600 in 2017 (and its equivalents) now sell for more than $1000. The exact same design. No new technology in it. No new R&D to fund. No improved warranty. I'm not going to spend that to replace mine. You shouldn't either. Nobody should. It's time for the market to reset the pricing by reducing demand. Fix your old robot instead. A robot is a significant investment and you should be able to replace parts that wear out without getting fleeced. It's also better for the environment to keep older robots in service than send them to the junkyard after 5 years.
I speculate there is a lot of greed among the execs at these vendors. If an 80% price increase in 6 years (far outpacing inflation) isn't enough evidence of that greed, the lack of spare parts and their unwillingness to sell you the parts is further proof. Maytronics will only sell you a full drive unit for $450. They don't sell the individual motors or boards that go in that unit, and oddly, there don't seem to be any third-party manufacturers supplying them either, which is puzzling. Maybe there is even more greed in the form of contracts preventing OEM suppliers from selling the raw parts? Somebody could make good money taking a motor that costs $25 to produce and selling it for $50 to repair all of these robots that are failing after 3 to 5 years of use. Maybe pool robots need a right-to-repair law like there is for cars in my state. Ok, enough ranting on robot economics. Onto how to fix them.
What Wears Out?
I've been lucky and not had any major problems with water getting into the drive unit. The seals have worked pretty well, though there was evidence of a little water in it two years ago when the impeller stopped spinning on my robot. It was about 3 years old at this point and ran probably 5 days a week on average for my 4 month long pool season. I found someone else's video blog that detailed how to replace the bearings in that motor and did it myself. $10 worth of bearings instead of $450 for a new drive unit. Great! I should've been able to just get a new motor assembly that probably costs $25 to manufacture instead, but at least my robot was running again. And it ran fine for another two years. Until...
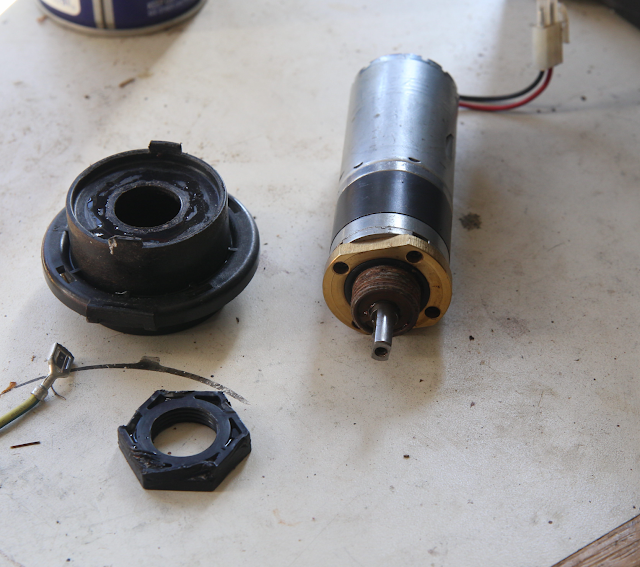
A couple weeks ago the robot stopped moving- the drive wheels wouldn't spin. I took apart the drive motor to diagnose the problem and found the motor worked fine. I put the motor and transmission back together, reinstalled it and the robot worked for about 5 minutes then stalled again. I took it apart, cleaned out all the old grease in the transmission and put fresh grease in and carefully reassembled it. This time it worked for an hour before stopping again. Further debug seemed to point to the transmission getting jammed- I couldn't force the motor to turn by turning the driveshaft. Another teardown and this time I looked more closely at the parts and found that the spindles that three of the planetary gears in the transmission ride on looked like they had worn down. I had initially assumed one was smaller to allow for play in the transmission for assembly and such, but I think it was just worn down.
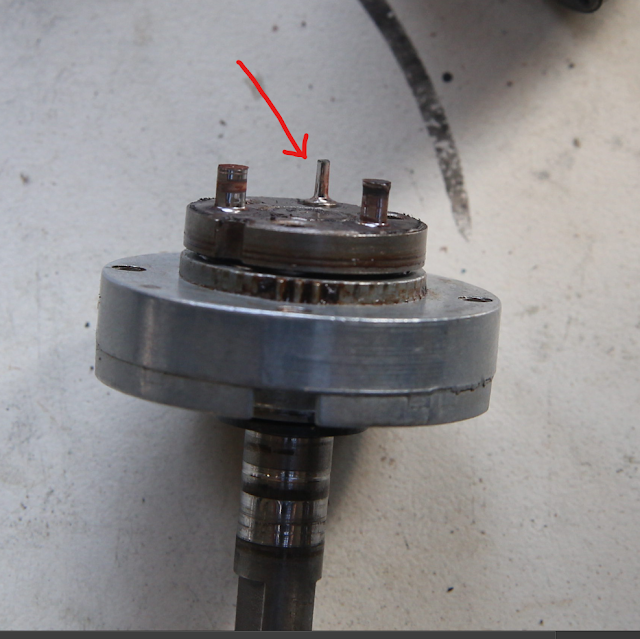
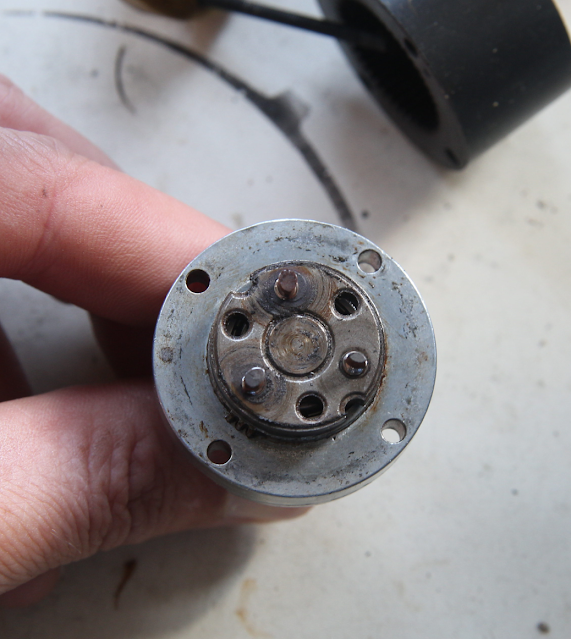
This picture shows the worn spindles.
The Fix
As a test, I wrapped some masking tape around the spindles to bulk them up again and put the robot back together. It worked! It ran for at least 3 days while I waited on delivery of some brass tubing to attempt a longer-term fix.
I ordered this set of brass tubing to cover the sizes I most thought would fit over the worn spindles. It turns out the 3mm OD was the right size- the gears fit nicely over it. It was a little small to fit over the two pins that weren't quite as worn, however, so I needed to grind the sides down on them a little further.
I cut the brass tube down to length. I left them a little long and was able to grind down the ends after fitting them. I tried to solder them to what was left of the old spindles and fill the tubes with solder, but I couldn't get the solder to flow into the tube and secure it. I was just able to get a little cap on the end. I'm not sure it is really necessary anyway, so I don't recommend trying that approach. Update: I now recommend filling the tubes with solder. Without the solder, one of the tubes came loose and jammed the transmission again after a week. See below for more detail on the soldering.
After putting the gears on, I ground the tops of the brass tubes down so they were flush and reassembled the motor. It is a bit fiddly to get all the pieces lined up and fitting together again, but once it was done, back in the robot it went and now it is back running and cleaning. Hopefully this fix lasts for awhile.
Here is the step by step instructions for this fix
Step 1: Remove the drive Motor
- Remove the drive unit from the robot. This requires removing 4 screws that are pretty obviously located. I'm not including details here- if you can't figure out this step, stop now and give up. This repair is beyond your abilities!
- The drive unit is held on by two clips. Undo the clips and pull out the motor
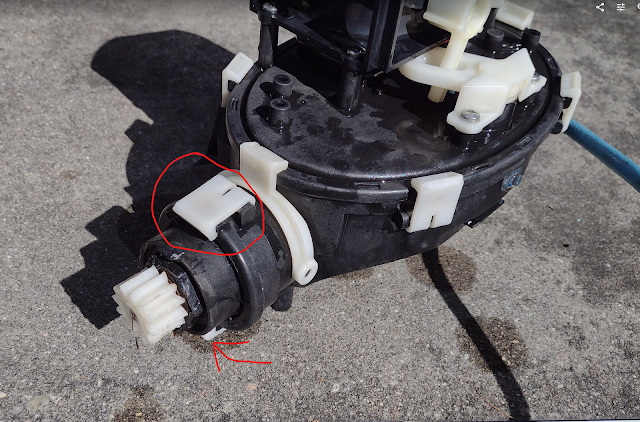
- Disconnect the power connection. Easy peasy! Maytronics at least made these units easy to work on.

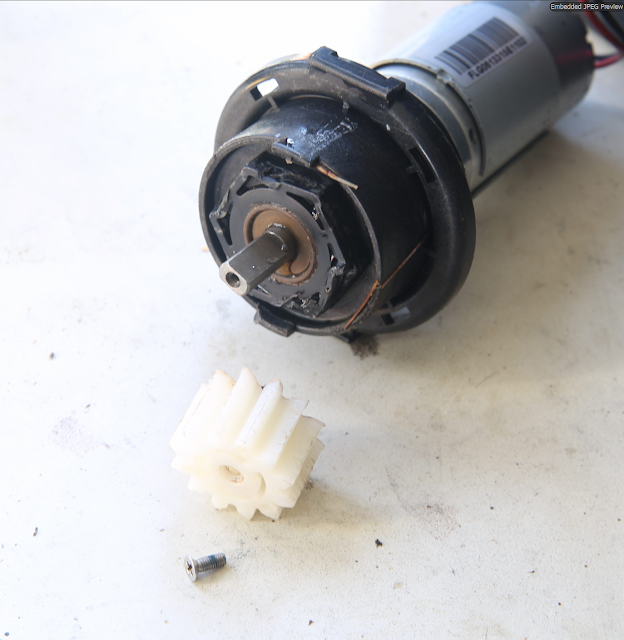
Step 2: Remove the drive wheel
- remove the screw at the end and pull the gear wheel straight off.
- At this point you can use some pliers to try to turn the drive shaft. Be sure to turn it in both directions- my worn one would often bind at the change between forwards and backwards. On my failed unit, the shaft would not turn. It was jammed in the gearbox so I couldn't spin it from the outside and the motor couldn't spin it from the inside. If your motor spins OK at this stage, a jammed transmission may not be your problem, so you may need to investigate if the motor works at all instead. I don't have details for that here, but basically hook it up to a 12V or 24V power supply and see if it spins.
Step 3: Remove the big nut
- You can probably tell by the marks, that I did this with some pliers the first couple times, which was slowly destroying the nut. I finally found a socket that fit it- use a 32mm socket if you have one to remove the nut.
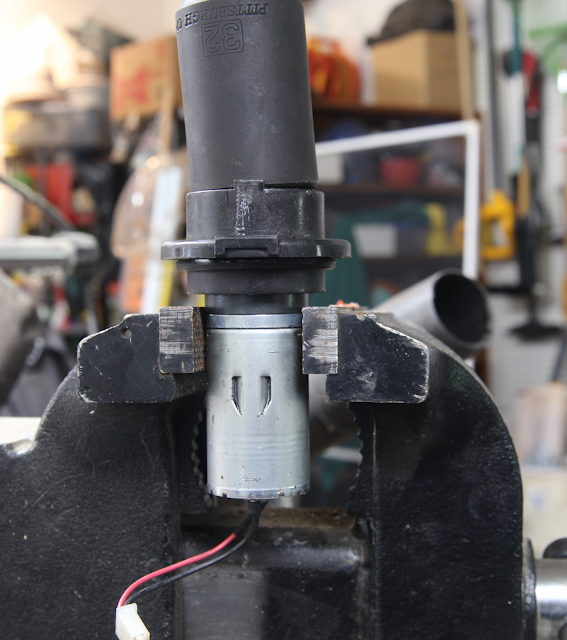
- After the nut is removed, the plastic bulkhead can be pulled off
Step 4: Unscrew the transmission bolts
- These are 4 little Phillips head bolts that hold the transmission together and attach it to the motor
- You can now separate the transmission from the motor. Try to remember how everything goes because you will have to put it back together again!


Step 5: Take apart the transmission
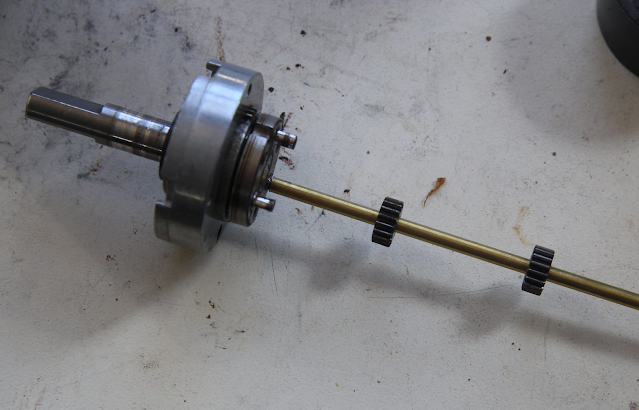
- There are three planetary gears on the motor side and another three on the wheel side. They rotate within the splined transmission housing with another gear in the middle resulting in a speed reduction (and torque increase)
- Check for wear on all parts, including the spindles that the gears rotate on. If yours is like mine, the old grease is dried up and no longer functional. You can clean and degrease all these parts.

- These are the spindles on the motor side of the transmission with the gears on them. They look perfectly round with no significant wear.

- In comparison, these are the worn spindles on the wheel side. All are ovalized to some degree. These are what needs fixing to prevent the transmission from jamming. I am installing brass tubing over these to return them to an appropriate diameter to hold the gears in the proper position.
Step 6: Cut the new tubes to length
- This photo shows the concept of using a brass tube to fit over the remaining spindle on which the gear can rotate. The 3mm tube fit reasonably well over the spindle, though two of them did require a little filing down to make it fit better. The gears fit over the outside without much play but were still able to turn freely.
- Update- to solder the tubes to the pins for a more secure fit, I placed the tube horizontally, put the end of the solder into it and then heated it with a torch to fill the tube with solder. When the solder solidifies, I then put it on the spindle and pushed it over the spindle while heating with the torch to force it on the pin and have the solder form around it. I then cut the tube off above the top of the spindle.
- I cut them a little long and fit them over the remainders of the worn spindles.
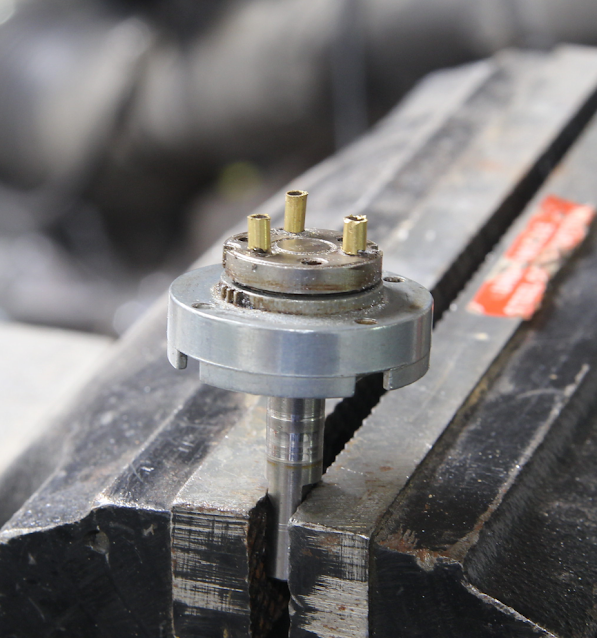
Step 7: Grind down the tops of the tubes
- Depending on how long you cut them, this step may not be necessary. I cut mine a little long and thus had to grind them down flush with the gears. Be careful not to damage any of the gear splines.

Step 8: Reassemble
- Clean off all debris that might still be on or in the parts.
- It is a little difficult to get all the gears to stay in place and line up all the bolt holes. Sometimes you need to rotate the drive shaft a little to get the gears to line up.
- The gray transmission housing needs to fit in with some splines on the motor housing and the wheel shaft. Sometimes it takes some playing and wiggling to get this all to work.
- Put new grease around the gears as you re-assemble them. That will also help hold them in place while you put it back together.
- Turn the drive shaft (probably need some pliers) in both directions to make sure the transmission isn't jammed and is spinning the motor.
- If you have a power source, you can run 12 or 24V into the motor with either polarity to see it turning.
- If all has gone well, you can reassemble it into the robot and give it a test run. Be sure the O-ring that goes between the motor housing and the drive unit is clean to get a good watertight seal.


That was a fantastic post. Really appreciate the effort you made to write it up .
ReplyDeleteJohn from Australia
Thank you and you're welcome, John from Australia!
Delete